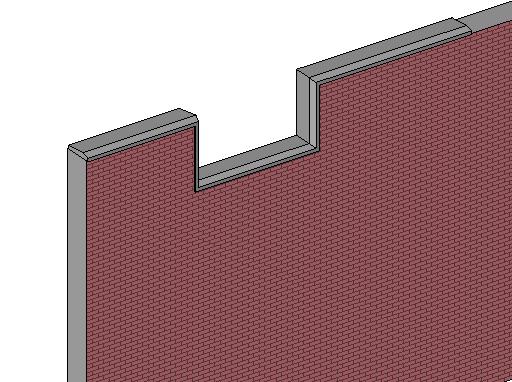
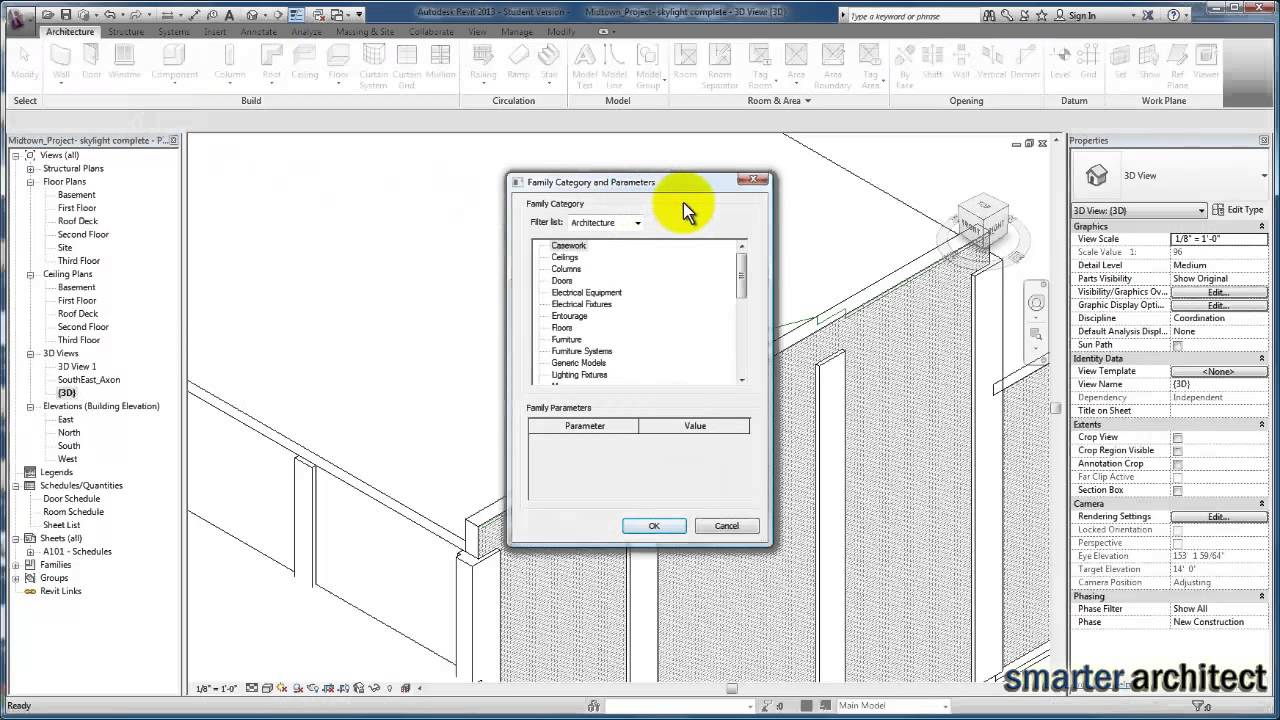
Wall End Cap Revit

Layer Wraps Autodesk Community Revit Products

Solved Opening Endcap Revit Help Autodesk Community Revit Products

Revit Wall Wrap Closure A How To Guide Youtube

Revit Tutorial Wrap A Wall Base At Wall Ends Youtube

Solved How To Create A Parapet In Revit Autodesk Community Revit Products

Wall Wraps در رویت Compound Wall Wall

How do i wrap the end of a wall in autodesk revit.
Wall end cap revit.

Solved End Walls At 45 Degree Autodesk Community Revit Products

Create And Show Individual Wall Wraps At Wall Ends Revit Products Autodesk Knowledge Network

Wall Sweep Stone Coping Cap Autodesk Community Revit Products

Revit Files Windsorone Diy Interior Decor Home Renovation Diy Remodel

Led Strip Light End Caps Led Strip Light Revit Led Strip Lighting Strip Lighting Led Down Lights

How To Create A Custom Stone End Wall Cap Autodesk Community Revit Products

Gutter End Caps In Revit Architecture Youtube

Solved Bull Nose End Cap At Wall Openings Autodesk Community Revit Products

Adding Flair With Flare Architecture Details Revit Architecture Barn Style House

Fortex 6 Pendant Direct Indirect Lumenwerx Free Bim Object For Revit Revit Bimobject Interior Lighting Fixtures Light Fixtures

Pu Prefabricated Wall Panel Construction Detail Google Search Insulated Concrete Forms Concrete Houses Traditional Building

Cut Wall End At An Angle Autodesk Community

How To Make A Gable Concrete Facial Using Sweep On Revit Concrete Sweep How To Make

Full Project Using Revit Structure 1 Civil Engineering Community Civil Engineering Software Civil Engineering Engineering
Wall Stone Coping Cap Autodesk Community Revit Products

Wall End Caps Youtube

Solved How To Place Wall On Spiral Ramp Autodesk Community Revit Products

Zimarc Zimarcdotcom Instagram Photos And Videos Revit Tutorial Parametric Architecture Parametric Design
Https Encrypted Tbn0 Gstatic Com Images Q Tbn 3aand9gcruohk Rcvr6xdqqgvaw7obzmweapgw7oig9csdens Vq1bvim9 Usqp Cau


Revit How To Create A Profile And Wall Sweep Youtube
Revit Tutorials Custom Wall Parapet Youtube

Ada Shower Stall Revit Toilet Partition Design Commercial Bathroom Designs Restroom Design

Flashing For Top Parapet Wall Autodesk Community Revit Products
Edit Layers In A Compound Structure Revit Products Autodesk Knowledge Network

7 1 Vertically Compound Walls Autodesk Revit Free Online Course

Sweep Won T Wrap At Ends Autodesk Community Revit Products

Revit Wall Cleanups Cadtechseminars Com Youtube

Curtain Wall Detail Bing Images With Images Curtain Wall Detail Roof Detail Facade Architecture

Changing The Color Of Material Appearance In Revit Youtube

Intro To Massing And Curved Curtain Wall Systems In Autodesk Revit 2014 Wall Systems Homemade Curtains Vintage Curtains

Solved How To Change Coarse Fill Color Autodesk Community Revit Products
Solved Create Basement Retaining Wall In Revit Autodesk Community Revit Products

Concept Click Aluminium Battens Architecture Ceiling Ceiling Design French Architecture

Polycarbonate Wall Detail Google Search

Object Cashier Display Desk Arquitetura

Revit Tutorial How To Attach A Wall To A Stair In Revit 2020 Youtube

Trim Tex Reveal Shadow Drywall Detail Trim Tex Drywall Drywall Installation

Nathaniel Richards Revit Sample Facade Sample Projects

Revit Setting Up R Value Btu For A Fiberglass Wall Youtube

Marvelous Reception Desk In Revit To Inspire You Medical Office Design Chiropractic Office Design Receptionist Design

Pin On Roof Tie In

Crease Lighting For Very Subtle Illumination City Lighting Products Https Www F Architectural Lighting Design Lighting Design Interior Light Architecture
Https Encrypted Tbn0 Gstatic Com Images Q Tbn 3aand9gcrkfytjc8fjja1 5uxwox2vqlsxol0q0ngx5xw2dyi94td Ucqh Usqp Cau
Source : pinterest.com
